Overview
Guides allow you to easily illustrate technical procedures to any audience. Dozuki guides are used for everything from replacing the logic board on an iPad Mini to calibrating a CNC machine. This overview helps you understand the various elements that make up a guide page.

Edit, Full Screen, Operator View, and Options
The first page of a guide features four options which are located in the top-right of the page: Edit, Full Screen, Operator View, and Options.
In Standard View the first page features the Full Screen option and not the Operator View option.

When Data Capture is turned on, the first page features the Operator View option and not Full Screen option.

Edit
Click Edit to add and edit the elements of your guide page. Guide editing is organized under four sub-sections: Introduction, Details, Guide Steps, and Approval Process.
Introduction
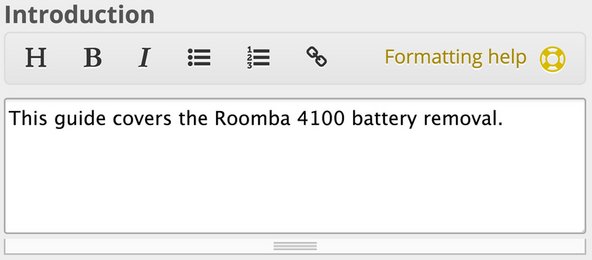
The Guide Introduction is the first tab on the left of the page when you create or edit a guide. The Introduction is where you add introductory information for the guide, including the guide summary and guide flags. A strong introduction better acquaints users with your procedure.

Provide a basic outline of your guide in the introduction field. Advice, anecdotes, and important safety protocols all belong here. The introduction may be as brief or as lengthy as you want.
Details
Guide Details give users important information that they need before starting a procedure. Required tools and parts, prerequisites, time required, and other logistics-related pieces of information are located on the Details page.

Guide Steps
Learn how to add text and photos and edit bullets to make your step-by-step guide a complete documentation experience.

Approval Process
The Dozuki Approvals feature is assigned on a guide-by-guide basis. Approvals allows you to specify which users should review and approve or reject new versions of each guide. The Dozuki Approvals feature supports one to ten sequential approval stages. A single stage can be assigned an individual user or a group of users, which are referred to as Teams in Dozuki.
To learn more visit our Approval Processes Help Documentation!

Full Screen
Click Full Screen to view the guide in full screen mode. This is typically what a user will see/use when completing a guide on a mobile device/tablet.

Operator View
With Data Capture on, click Operator View to insert customizable fields that allow you to collect essential information from your users as they complete a process.
From tracing product progress to ensuring quality standards, you can author prompts that meet all of your needs. Make this valuable data easily accessible by integrating with any of your preferred reporting tools or spreadsheet programs.
Once Operator View is activated on a guide, any user with access to the guide can select the Operator View option in the top menu.
Visit Dozuki Help to access all the details.

Options
Options features a drop-down menu from which you may select the guide’s History, Save to Favorites, Download PDF, Translate, Expand Comments, Get Shareable Link, Embed This Guide, and Notify Me of Changes.

History
A guide's history shows you the entire timeline of changes to the guide. You can even revert back to any previous state. The History option allow you to view the entire revision history for a guide page. You can view the history chronologically according to the revisions’ dates and times, or you can view the guide page’s history its by Release Version (if your site has the Version Control Feature activated).
This link takes you to the Guide History wiki where you can gain more in-depth knowledge of the parts of the history page.
Save to Favorites
When a user favorites a guide, that guide is added to their User Profile. Many users will favorite their frequently used guides for quick and easy access. Favorited guides will also be saved in both the Android and iOS Dozuki mobile applications for offline viewing. Your favorited guides are listed under the section My Favorite Guides.
Use this link for further instruction on Save to Favorites.
Download PDF
To view your guide offline, you can download it as a PDF. Downloading a PDF version of your guide is super easy. In the Options menu, Select Download PDF, and a PDF file of your guide will open.
Translate
The main site translation feature allows users to instantly translate the site interface into many languages. iFixit and Dozuki support machine translations from Google Translate. This means we have the potential to host ANY language supported by Google Translate on your site. That's over 100 languages.
The languages currently supported can be viewed here; however, if you are looking to translate your site into a language you do not see on the list, feel free to contact Dozuki Support at support@dozuki.com to request an addition to our current list.
With this link to our Languages Help Documentation, you will find a number of helpful guides for translating your guides, both manual and machine translations.
Expand and Collapse Comments
The Expand Comments option gives you the opportunity to read comments that have been posted for or about your guide.
When you select Expand Comments, scroll down to the bottom of the guide page to the Comments section. If users have commented on your guide, you will see a username link to their profile page. Click the link to view users who have commented on your guide. Near the bottom of their profile page, you will find a link to their comments on your guide, under Guide Comments. Once you have read the comments, or if you want the comments to be concealed, select Collapse Comments from the Options drop-down menu.
Get Shareable Link
This feature is a quick and easy way to create a link that you can copy and share with others.
Embed This Guide
Select Embed this Guide to embed a guide as a small widget on your site/forum. The feature allows you to choose the size that fits your need, and you can even preview your embed size selection!
Notify Me of Changes
Selecting Notify Me of Changes subscribes you to notifications for changes made to your guide.
The Notification Bell icon in the upper-right of the site header dons a red dot which is your signal that you have notifications that need your attention. Users accessing a site use the Notifications Bell (tool) to quickly receive and review real-time notifications as they navigate through their site pages.
Guide Type
| Note: This option will only be available if you have more than one Guide Type activated on your site. Site admins can activate the following "guide types": How-To (default), Replacement, Installation, Repair, Disassembly, Maintenance, and Troubleshooting. |
|---|
If applicable, your site administrator can choose to allow guide types for the various procedures on your site. Click on the drop-down menu at the top of the Introduction tab to select a type from your site's available options.
Each guide type is organized within its own section on the Category Page. Here is an example of a category with guides in five different categories:

Category Name
Use the Category Name field to choose which category this guide will display in. For example, if you are showing people how to add a hand brake to a Razor scooter, your category would likely be "Razor Scooter."
Search Summary

In the search summary field, use a sentence or two to briefly describe your guide. What you type here shows up as a quick blurb in search results, so it's important to be succinct.
Example Summary: Constructing your own suit of chain mail armor from ordinary household objects.
Video Overview

In the video overview section, you can attach a video that describes the overall process of the guide. Additionally, if you want to highlight certain requirements or safety notes for a guide, this is an ideal place to put it.
Flags
Flags tell the user about the status of a guide. A detailed discussion on the specifics of guide flags can be found on the About Flags Help Page. You may also visit flags, to learn from a comprehensive selection of Dozuki Help Documentation that is specific to guide flags .
By default, the “In Progress” flag is added to any new guide. You may add or remove most flags by returning to the Guide Introduction tab at any point. Some flags, such as “User Contributed,” can only be removed by an administrator.
To ensure quality in all guides, any member can flag another member’s guide for any number of reasons. Some of these reasons include incorrect grammar, off-topic material, offensive text, or low-quality images. Flags are intended to point out opportunities for continuous improvement.
Access Control

Okay, so you have created a guide. Now it is time to control who has access to it. Guide Access Control on a Dozuki site is very flexible, and it enables your end users to find the procedures that they need quickly and easily. When your guide is set to Public, it is viewable to every user on the site once it is published. If a guide is set to Private, it is only viewable by your privileged users (Admins and Authors), unless otherwise specified. To make exceptions to the privacy settings, type in the name of the team or individual in the specified areas, select from the drop-down menu that appears, and click save. Once published, those specific users or teams have access to that content, no matter their user type.
Edit Permissions
Edit Permissions is an administrator; it is only feature that keeps track of edits made by site members. Set the permissions threshold from 0 to ∞ for any guide by adjusting the slider on the right-side of your screen while editing the guide. Edits made to a guide by a user with a reputation lower than the permission threshold are sent to the patrol queue for approval.
To learn more about editing permissions, see our page about the Permissions Manager.
Tags
What is the point of making a guide if no one will see it? Tags help your guide to show up in more search results. Simply add pertinent tags one-by-one and then save them. Anyone may add, delete, or edit tags on a guide at any point.

Delete Guide
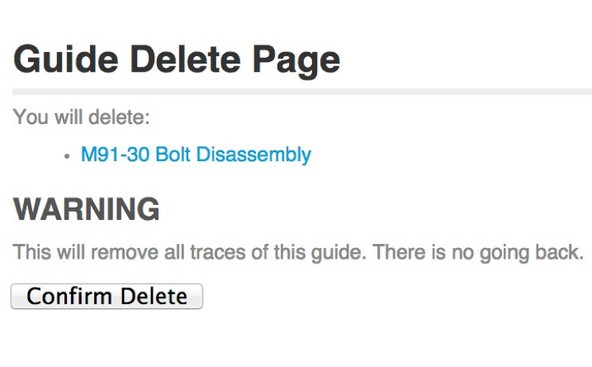
Deleting a guide is an irreversible leap of faith that can only be made by a guide's creator or an administrator. Once a guide is deleted, it cannot be recovered. The Delete Guide button is located at the bottom left of the page while editing (adjacent to the Undo, Preview, and Save buttons). Before clicking Delete Guide, consider repurposing or improving the guide. Deleting a guide cannot be undone, even by reverting to a previous version in the guide history.
Introduction
In virtually every genre of writing, a solid introduction is both essential and critical to the entire piece, be it an essay, a narrative, a business plan, or an instructional guide. Your Dozuki guide's introduction is your opportunity to prepare your users for your guide's purpose, processes, and/or the knowledge they will gain from your guide.
For your guide's Introduction, write a few summary statement sentences that communicate your guide's topic, purpose, and its scope (think range/extent of what it covers). You can also include imperatives that state the critical reasons for your guide's processes. In some instances, you may even want to include a thesis statement or point of view in your summary statement.
Details
The Details for your guide could be mistakenly overlooked or insufficiently supported. It's easy to want to jump to the "doing" part of a guide and skip over the planning and preparation. Frankly, planning and preparing can be tedious. That is why we commonly want to jump over organizational steps and dive into the "real" work of the instructions. However, as it is with most tasks worth doing, the details are the foundation for success and a job well-done.
The Details stage of your guide build is where you layout the "preliminaries" and the "nuts and bolts" before you to step-out your guide instructions. Details serve as an organizational aid as a user of your guide begins to process the procedure(s) at hand. You may think of them as a ramp or staging ground in the user's mind as they prepare, not only their thoughts but also the time, effort, tools, and parts your guide/procedure requires. Your guide Details create understanding/comprehension and logistical awareness for your users as they ready themselves for the task.
Time Required
Give people who follow your guide an estimate of how long this process will take. It is a good idea to be a little conservative with this estimate. It might take you less time to finish a process than it would take someone who is attempting the task for the first time.
Difficulty
Some procedures are fairly simple for any user, and others require years of specialized experience. Select a level of difficulty from the drop-down menu; give users an idea of the task's degree of difficulty.
Prerequisite Guides
Each guide is a completely independent step-by-step tutorial, but that does not mean that similar steps are not involved. If several guides follow some of the same procedures, you will not have to duplicate your work. To streamline your guide build process, use Prerequisite Guides, a feature wherein you can include one guide within another.
Here's an iFixit guide for removing a MacBook battery. The battery removal guide is a prerequisite for the MacBook RAM guide. You can see that the first two steps of the MacBook RAM guide are actually the steps for removing the battery.
Note: New steps cannot be created in between prerequisite guides. New steps can only be added after every prerequisite guide.
Using prerequisites saves you a lot of time, but there are potential pitfalls. You can only use prerequisites for portions of the disassembly that are sequential. Basically, you cannot insert new content between prerequisite guides, it can only be added after.
Advanced Prerequisites
If a guide you want to use as a prerequisite does not belong in the same category as the guide you are writing, you can use wiki syntax to add it as a prerequisite. Locate the guide ID in the URL of the guide to which you are adding a prerequisite (Hint: the guide ID is the last number in the guide URL). Now enter the the following wiki syntax directly into the prerequisite field: guideid:77. In this example, the number 77 is the guide ID.

Tools
Any item or instrument that is required or recommended to perform your specific procedure constitutes a tool. Tools may be conventional (screwdriver, pliers, hammer, hacksaw, etc.), not-so-conventional (sickle, leather belt, kitchen utensil, etc.), or highly specialized (piston ring compressor, bicycle chain remover, tri-wing screwdriver, etc.). An easy way to determine if an item is a tool is to ask yourself, "Will I still have this item after this procedure?" If this answer is yes, then you likely have a tool.
To add tools to your guide, click Add a Tool and begin typing the name of the tool. You will see a drop-down menu with a list of suggested tools to select. If the tool you want to add is not on that list, create a new tool to add to the guide.

Provide a brief explanation of the tool that explains how it is used and what it is used for. If it is an especially hard-to-find tool, consider providing a link to a site where the tool can be purchased.
After adding tools, you may select Edit Details for each of the tools to add a type, change the quantity, or include notes. For a hacksaw, you may want to specify the number of teeth per inch and in the note explain that cutting through metal requires more teeth per inch than a softer material like wood. To edit these details at any time, click on the pencil icon next to the tool name on Guide Details.
Tools do not automatically import from prerequisite guides. Use the Import Tools from Prerequisite Guides feature to add the tools from all of your prerequisite guides to your current guide.
Parts
Whether you are building, fixing, or modifying something, chances are that the procedure is going to require parts. Like tools, parts are important to completing the guide, and they are often what makes the guide necessary. If you had no speakers or lights to install in your boom box, then there would be no need for a guide showing how to install them. Whereas tools are the items that you will still have after completing the guide, parts are items that you probably will no longer have after the process. Specific components, mechanical fasteners, adhesives, and lubricants are all parts.
To add parts to your guide, click on the Add a part button and begin typing the name of the part you are adding. You will see a drop-down menu with a list of suggested parts. If the part you want to add is not on that list, you have the option to create a new part.
Provide a brief explanation of the part that describes what it does and where it goes. If it is an especially hard-to-find part, you might want to provide a link to a site that sells it.
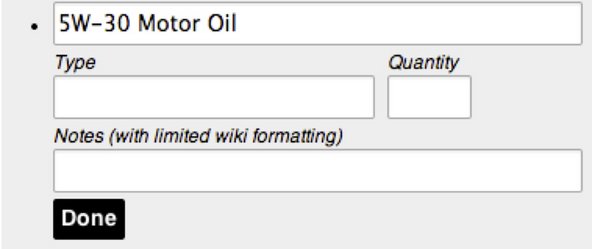
After adding your parts, you may select Edit Details for each of the parts to add a type, change the quantity, or include notes. For example, if your part is a quart of 5W-30 automotive engine oil, the type would be conventional or synthetic, the quantity might be 5, and in the notes you could tell others that 10W-30 is also an acceptable oil to use in warmer climates. To edit these details at any time, click on the pencil icon next to the tool name on Guide Details.
Conclusion
Add a note to the end of your guide in the Conclusion. This can be a simple congratulatory statement, like "You did it!" or informational, like "To reassemble your refrigerator, follow these directions in reverse order." If you have said all that you have to say, just leave this section blank.
Attach Documents
Some procedures require additional documents, like a handbook, a wiring diagram, a parts diagram, or a manufacturer's manual. Both PDFs and Office documents can be attached to guides. To attach documents, click on the Add New button in the Attached documents section in the lower-half of the Details page.

Click on one of the Upload Media buttons. There is an Upload Media button in the center of the page and another upload button in the upper-left corner of the MEDIA MANAGER.

The NEW MEDIA page will open. You have three options for adding a document. You may use the Drag & drop here feature, click browse for files, or type a URL in the upload by URL field. Choose your method of uploading and click on the Grab media button.

When you select your document, it will be loaded into your MEDIA MANAGER. Click on the document, and it will load in your Details page in Attached documents. To complete the document attachment process, click on the Save button beneath your document.

Bulk Step Creator
Just because you have written a great how-to guide outside of our Guide Creator does not mean that you have to start over on all that hard work. The Bulk Step Creator allows you to paste text from a webpage or text document and convert it directly to guide steps.
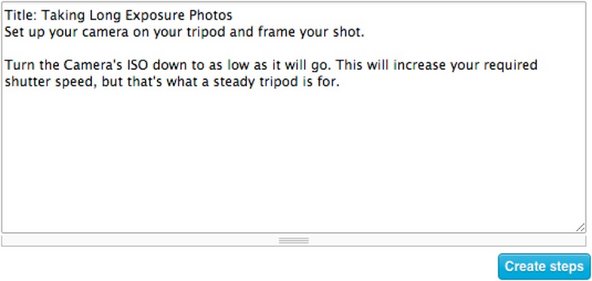
Begin adding steps by clicking Bulk-Import Steps in the Details tab. The first line of each step can specify a site's title. To add a title to your step, type in "Title:" and then the desired step title. If you would rather not give your step a title, just start adding bullets. To add bullets, enter one line of text for each bullet within a step. There should not be an empty line between bullets within the same step. To add a new step, put an empty line between the last line of the previous step and the first line or title of the new step. When you have added all of your steps, click Create Steps, and your steps will appear.
Example:
The Bulk Step Creator will take this:
And turn it into this:

Permissions Manager
Permissions Manager is an administrator–only feature that keeps track of edits made by site members. Set the permissions threshold to any number from 0 to ∞ for any guide by adjusting the slider to the right of the text window. Edits made to a guide by a user with a reputation lower than the permission threshold will be sent to the patrol queue for approval.
For more information, see our Permissions Manager page.
Tags
What's the point of making a step-by-step how-to guide if no one will see it? Add pertinent tags to your guide, and your guide will show up in more search results. Add the tags one-by-one and save them. Anyone may add, delete, or edit tags on a guide at any point.
Guide Steps
Dozuki guide steps are nimble and highly adaptable for your content needs. In each step, image uploading, titles, instructional colored and informational bullets, and a complement of editing features are at your service!
Images
Images are an incredibly important aspect of a guide that set your documentation apart. Use the Media Manager to add the desired image(s) to each step. Each step may have up to three images.
Adding a Title
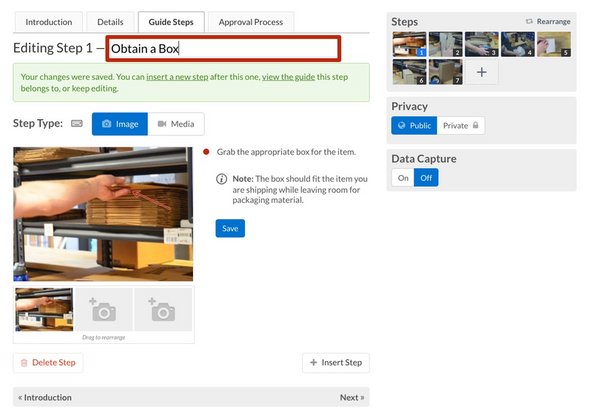
The Add a Title field allows you to give each step a unique title. Choose a title that helps users understand what will be explained to them in this step. This field is located directly above the images when editing a step. Click on Add a Title and type in the desired step title.

Bullets
Guide bullets are customizable icons that make your steps easy to follow. By default the bullets in a guide will appear black, but you can change their color or shape by clicking on them while editing a guide step.

Colored Bullets
If you have added any markers to an image and a particular bullet corresponds to a marker on the image, change the bullet color to match that marker.
Caution, Note, and Reminder Bullets
In addition to colored bullets, there are also special icon bullets—each with its own purpose.
- Use a caution bullet whenever someone attempting the procedure may injure themselves or damage their equipment.
- Note bullets are useful bits of information that complement the instructions.
- The reminder bullet is used to remind workers of something in the process that they might otherwise forget. The reminder bullet also provides information for after the procedure is completed, such as tips for reassembly.
View our step by step guide that explains how to format and use bullet points within a guide step.
Adding and Editing Steps
Steps are the building blocks for a solid set of documentation. The Guide Creator makes adding and editing steps easy and efficient.
Adding Guide Steps
There are two ways to add a new step to a guide.
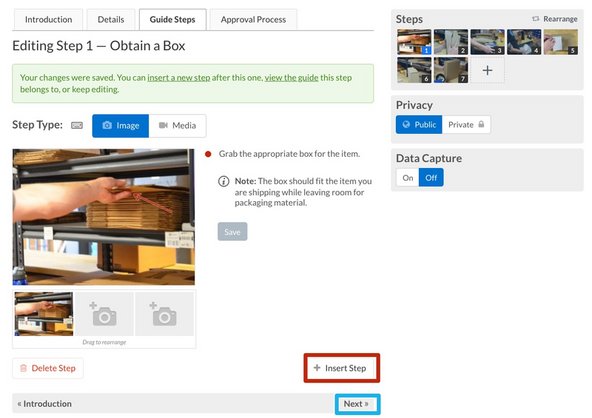
To add a step, you may click on the + icon button on the right side of the Step Page, the last thumbnail in the list of step thumbnails.

Alternately, finish working on your step and save it. Click on either + Insert Step button or the Next button, beneath your bullet instructions for the step.
Editing Guide Steps
To edit a Guide Step, click on the Edit button at the top-right of the guide. This will direct you to the Guide Introduction edit page. From the list of guide steps on the right-side of the page, select the step you wish to edit. You can also edit a specific step by viewing a guide and selecting "Edit" to the right of the step title.

Click the text for the particular bullet that you are editing and type in your information. Once finish editing a step, click Save to save your changes.
Edit Step Icons
When editing a bullet on a Guide Step, you will see four icons below the bullet that you are editing: a left arrow, a right arrow, a plus sign, and an X. The arrows shift a bullet left or right, allowing you to indent certain lines. The plus sign adds a bullet below the one that you are working on. The X deletes the bullet you are working on. You cannot delete the only line of a guide step. Instead, you must select Delete Step.

Deleting Guide Steps
To delete a guide step, edit that step and click on the Delete Step button in the lower-left corner of the step page.
Rearranging Guide Steps
From any page in the Guide Creator, click Rearrange Steps, above the list of steps in the guide. Then click-hold and drag the thumbnail of the step that you are moving. Drag the step to where it belongs and release it. Click Save.
Keyboard Shortcuts
You are a busy person. Do you know what is great for that? Shortcuts. Instead of clicking all those buttons, save time by using these keyboard shortcuts while editing a guide step. All shortcuts can use 'ctrl' or 'alt' interchangeably:
- escape: Stop editing the current bullet
- ctrl+n: Stop editing the current bullet and move to the next one
- ctrl+p: Stop editing the current bullet and move to the previous one
- ctrl+shift+n: Stop editing the current bullet — insert and move to a new line below
- ctrl+shift+p: Stop editing the current bullet — insert and move to a new line above
- tab: Indent current bullet
- shift + tab: Dedent current bullet
- ctrl+d: Delete current bullet
- Hit Enter to move to the next line, or create a new line if you're at the bottom
- If you hit enter while on an unmodified, fresh line, it'll be removed.
- So, if you are on the last line, you can hit enter twice to stop editing.
- shift-enter: Will behave like enter, but in reverse (going up the list of lines).
Note: Some browsers use similar shortcuts that may override Dozuki shortcuts. If this happens, use the 'alt' key instead of 'ctrl'.
When viewing a guide:
- J: Jump to the next step
- K: Jump to the previous step


0 Comments